Onboarding a new product on the catalog
In this section you will learn how to start the onboarding process of your application on the Cloudesire marketplace.
Please note that the technical section of the onboarding process is different depending on the chosen product type: you need to clearly understand the differences between the available product types to successfully complete the onboarding of your product. Product type can't be changed after initial creation.
In order to see your product visible on the marketplace, at least one Plan should be published.
Start the onboarding process
To start the onboarding process, go to the marketplace and login to access at your personal Control Panel.
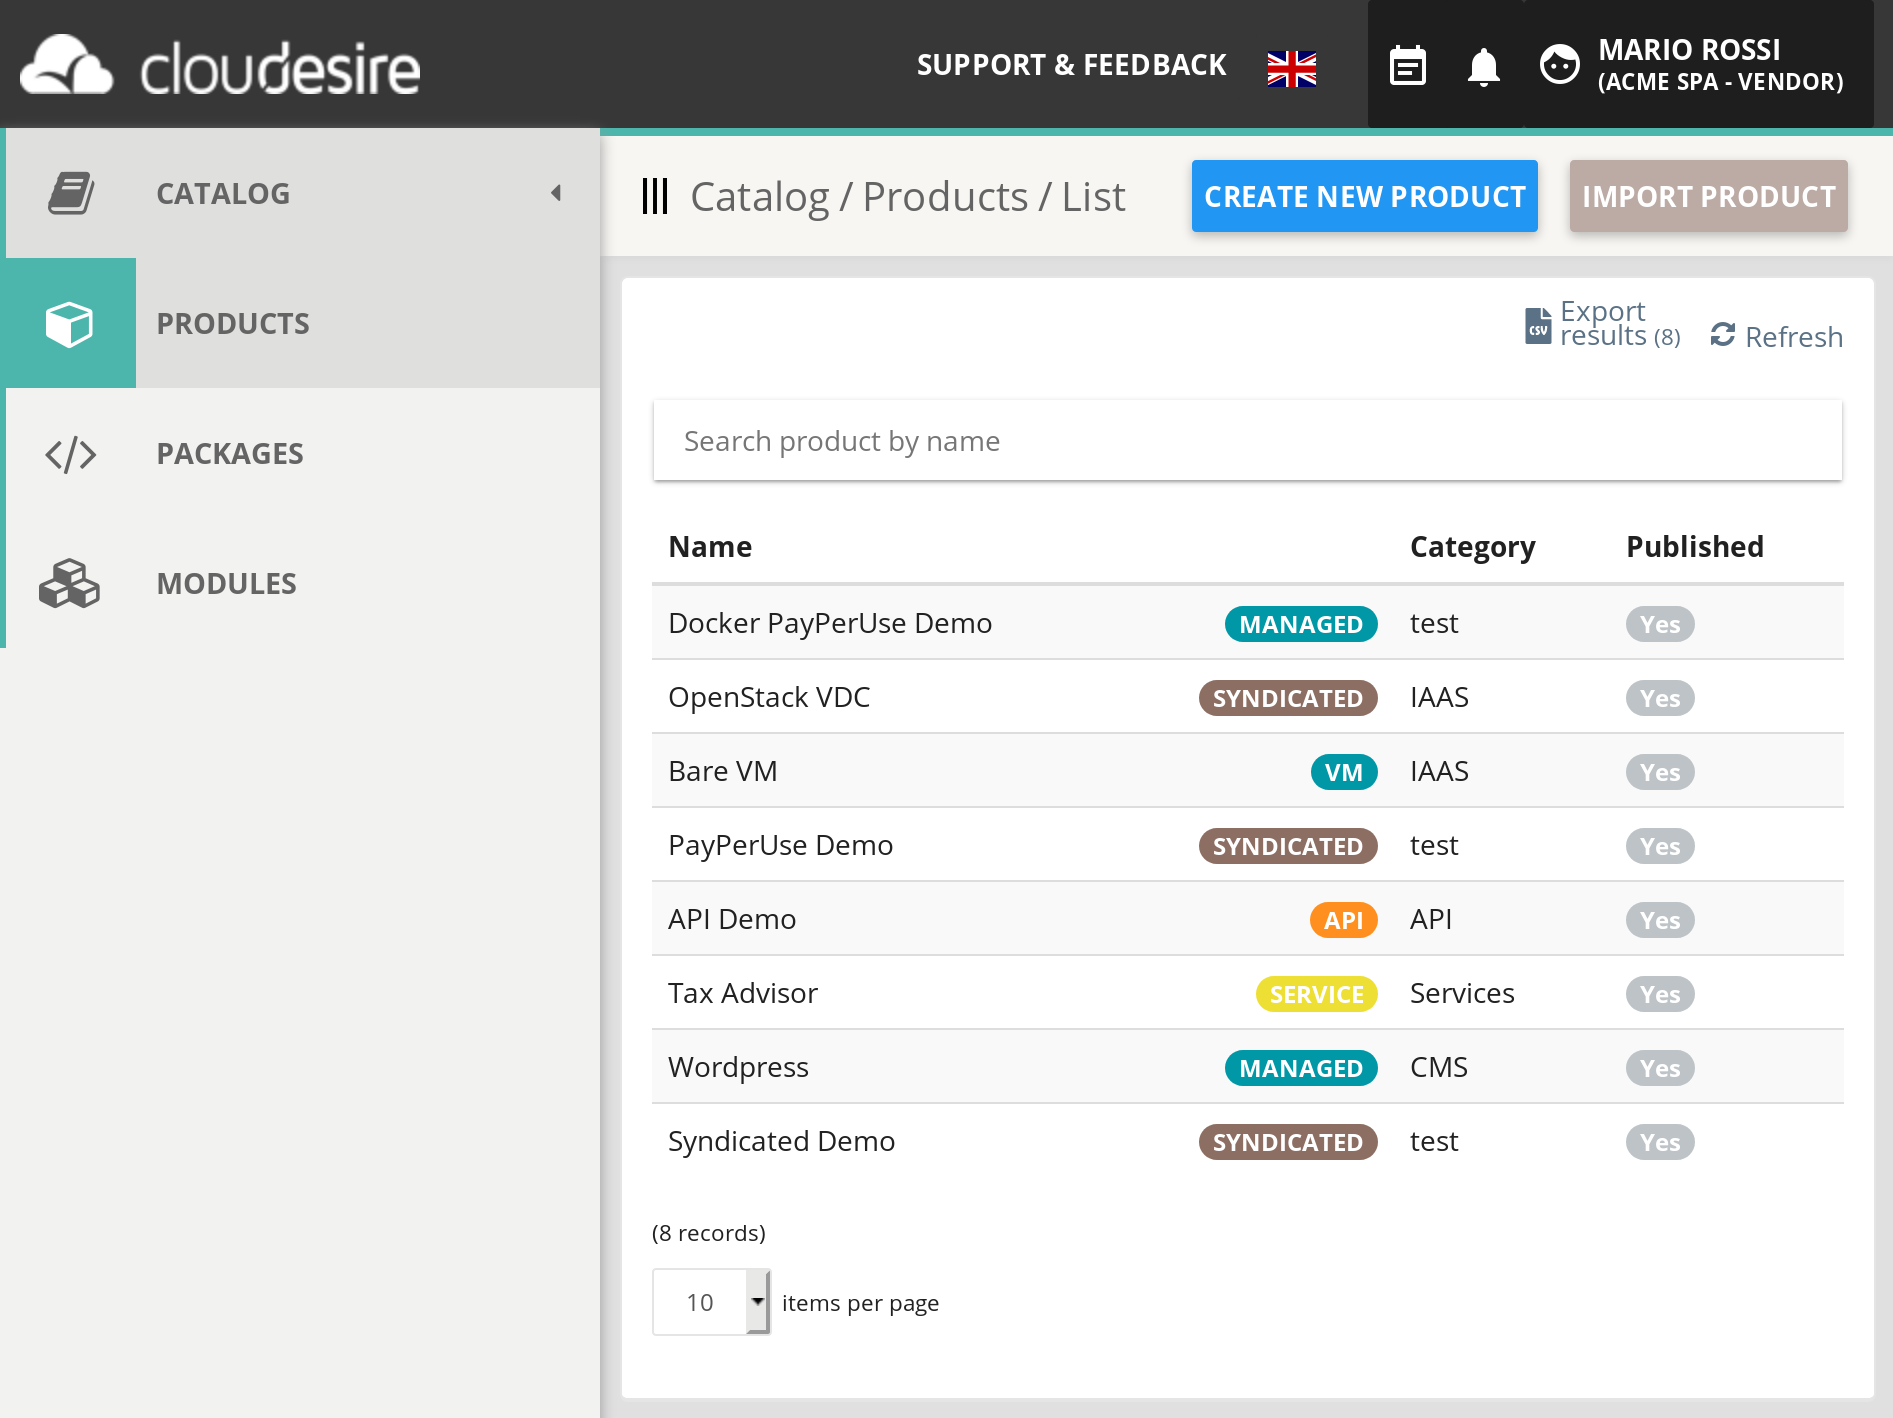
Select "Catalog" from the left menu, then select "Products" and click on the Create New Product button in the upper right hand corner.
You will see a pop-up in which you can insert your product name and choose between different product types.
- Syndicated Product to start onboarding a new product in Syndication mode.
- Cloud Service to start onboarding a new product in Syndication mode that requires existing credentials to operate (e.g. Cloud Provider, Kubernetes cluster)
- Service Product to start onboarding a new service, that is not tied to the distribution of an application to the end-user. This option is disabled by default, and can be enabled for specific environments.
- API Product to onboard a new API-based service.
Additional product types can be enabled, but they can be created and assigned to a vendor only by an administrator:
- CSP Product to onboard a new Microsoft/Azure product, see the CSP Product section;
- Bare VM to onboard a new bare Virtual-Machine with SSH access for customers, see the VM product page.
Other kinds of products can be provisioned via already-existing syndicated integrations (by specifying the related syndication endpoint to be asked to the platform administrators). The complete list of those kind of integrations is avaliabe here.
Please note that except for Syndicated Products, all other product types are typically disabled by default but they can be activated on your Cloudesire instance by configuring its environment accordingly.
Marketing & Sales Onboarding
In this section you will learn how to fill the product description, select the right pricing model and publish it into the Cloudesire marketplace catalog.
The Catalog contains all the applications owned by the vendor. In this section you can see both applications that are already published on the marketplace and applications that are still in configuration phase.
Product descriptions
Select a product and click on Edit Product lead the user to the page to start editing name, description and images of a product.
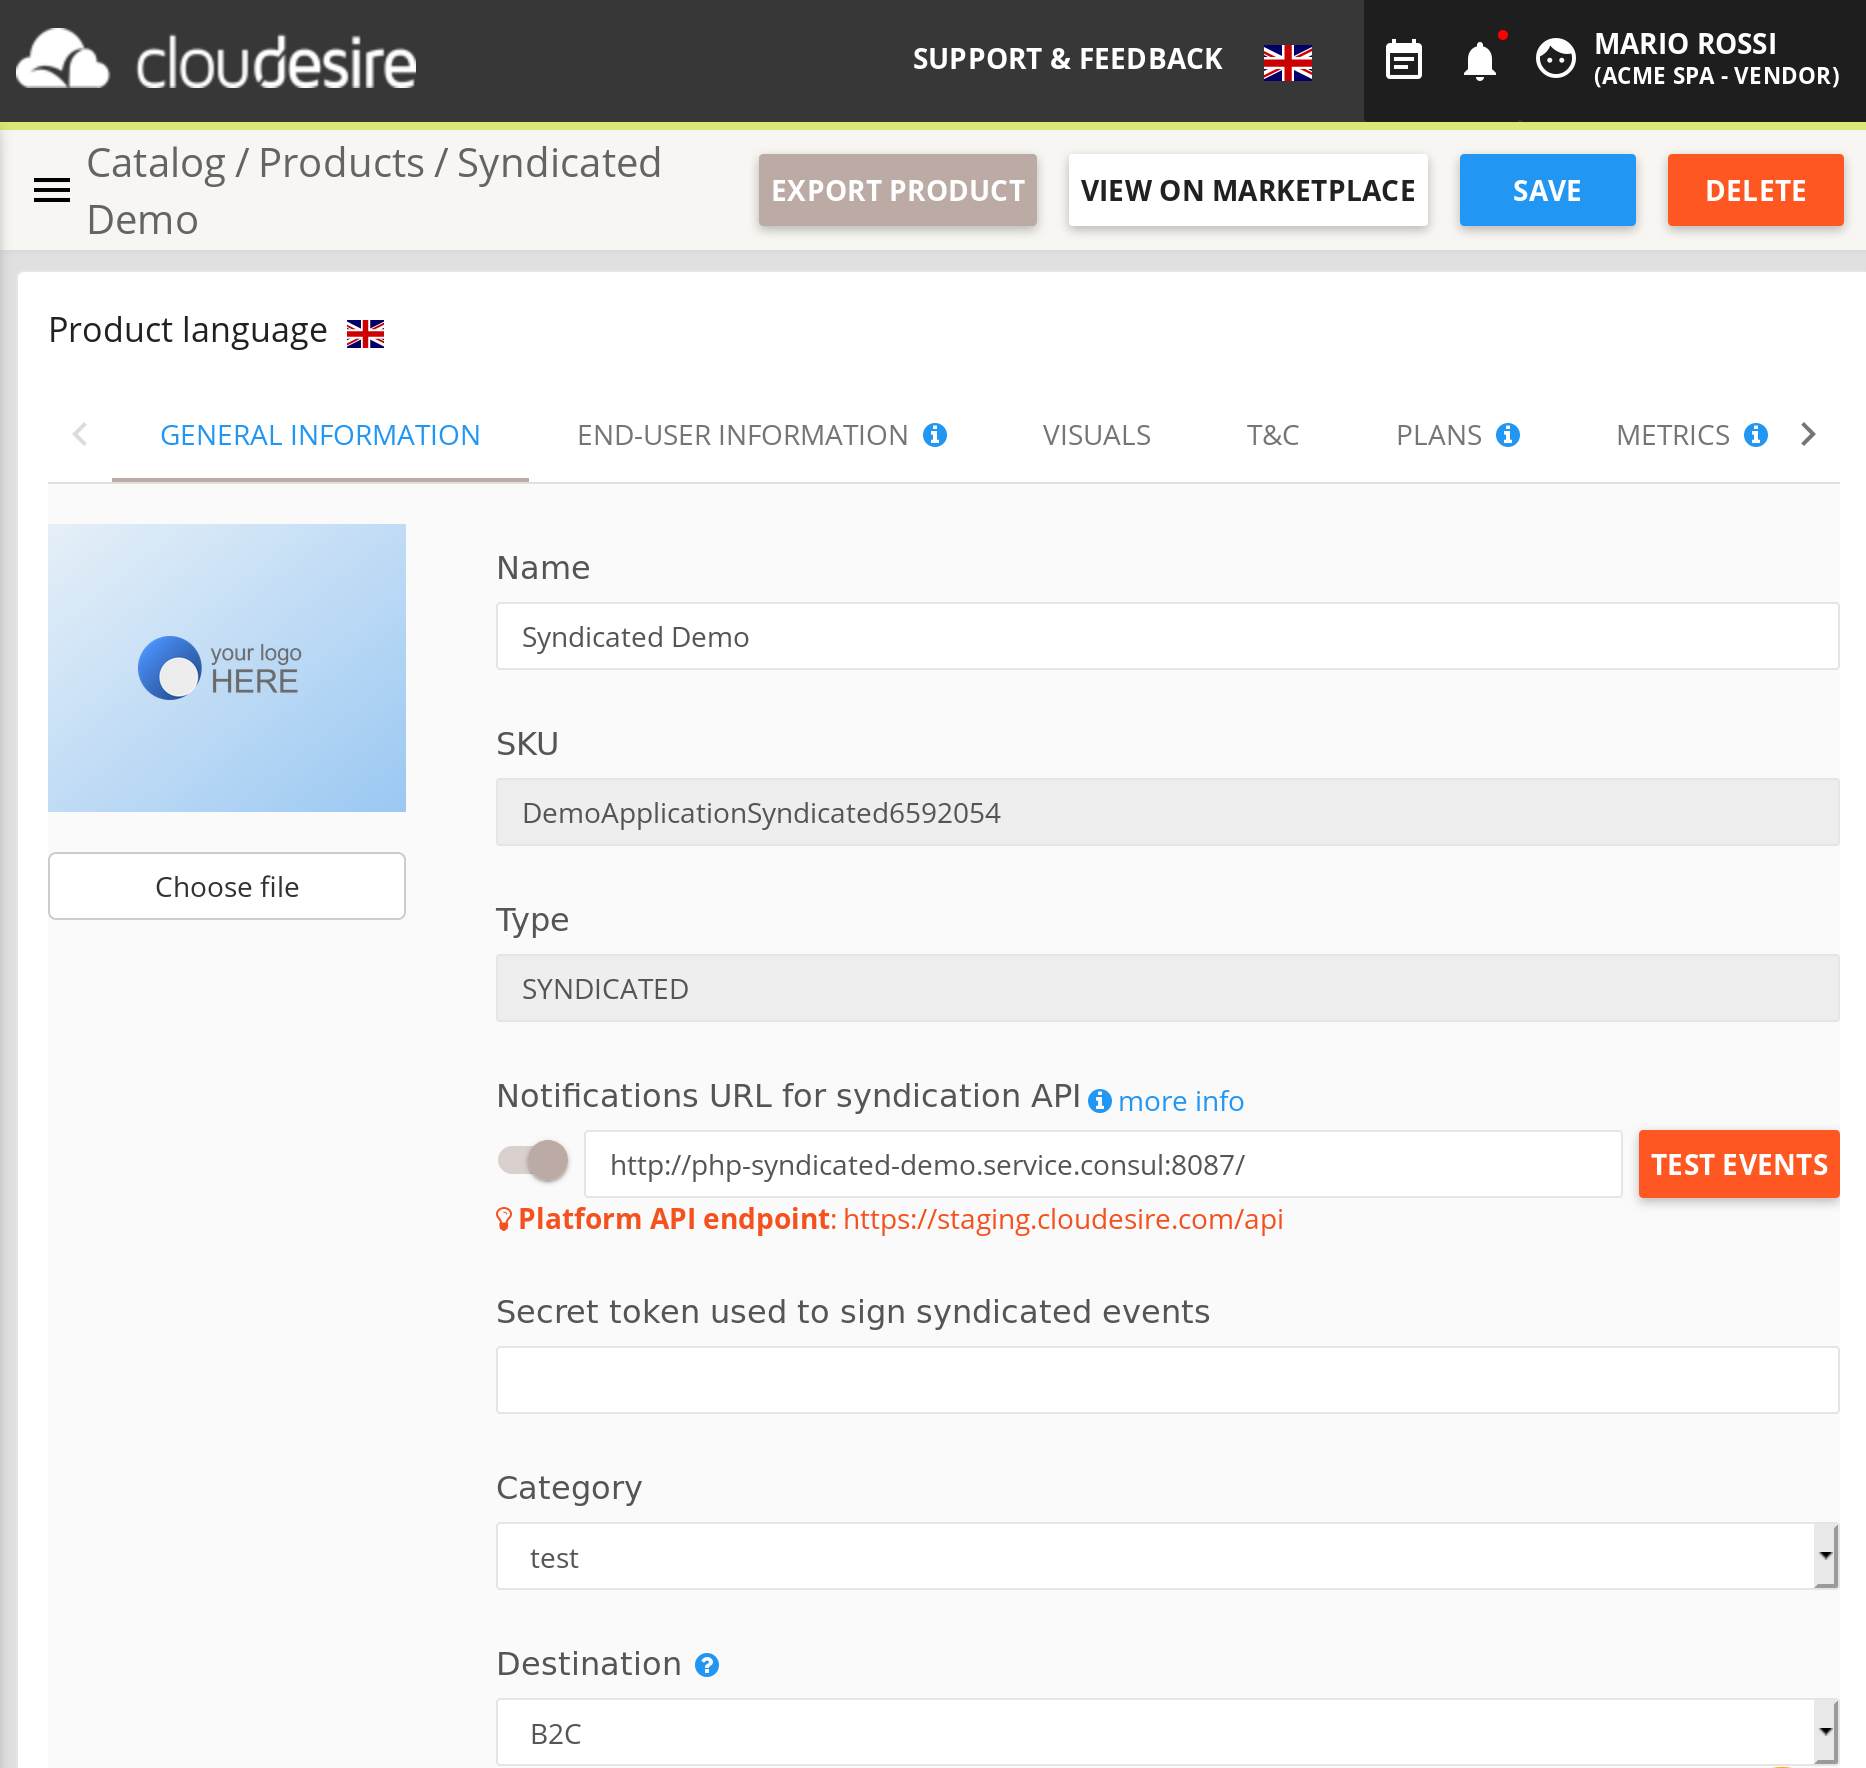
Please note that you can save your product by clicking on "Save Product" on the top right at any time.
General Information
- Logo: a logo with transparent background and 350x300 px in resolution.
- Product Name: your application name. It's the name that will be associated with your product on the marketplace.
- SKU: your product ID. You cannot change it once the product has been created, it's good to identify a particular product via API.
- Category (e.g. CMS, CRM): this will help customers to understand your product category and will be shown on your product page on the marketplace.
- Destination (B2B or B2C): this will prevent private customers to buy the product if it's meant to be sold only to businesses.
- Tags (keyword list): tags will help customers to quickly understand your product. Please, add only relevant tags, in order to avoid too many tags on the product page.
- Long and Short Description (text): describe your product to customers. Focus on product distinctive points for your ideal customers. You will have later dedicated sections to add benefits, features, details of each available plan, terms and conditions and privacy policy. Avoid too long descriptions (that no-one is going to read entirely). Bullets can be very useful to avoid long paragraphs. This is the first thing customers will read about your product, so please make sure it's clear, catchy and always without typos.
When localization support is enabled on the marketplace, you can see a flag around each localized field to switch languages. Remember to fill all available languages!
End-User Information
- End-user instructions: optional field, you can add here information that the customer will read during the first access to the product, after making an order. Common examples are default login and password or how to ask for support.
- Features and benefits (ordered list): features and benefits of your application. Please try to be clear and concise: customers will see this list as it is. We suggest to insert from 3 to 6 features and benefits. Avoid long lists.
- FAQ (ordered list of Questions and Answers): you can add some relevant FAQs about your product. Remember to add questions that can be relevant to help customers to choose your product, not only troubleshooting or the most asked questions.
Visuals
- Video URL (YouTube or Vimeo): a video can be shown on the product page. A short and effective ads of your product is a good choice, avoid tutorials or walk-through.
- Cover: this picture is used only on the the marketplace homepage slider, if the product has been promoted to featured by the marketplace owner. Please use a captivating high-quality image of 820x465 px in resolution.
- Screen-shots (list of images): these images will be shown to customers in the dedicated section, choose wisely which ones to show. Remember that is the first time that a potential customer will see your application in action: choose the most relevant or delightful sections of your application, avoid niche sections.
Terms and conditions (T&C)
- Terms of Service: users will be able to read the terms of service of your application.
- Service Level Agreement: users will be able to read the service level agreement of your application.
- Privacy Policy: users will be able to read the privacy policy of your application.
TOS, SLA and privacy are persistent after each purchase order, please avoid providing a link which content is subject to change during time.
Plans
Plans are used to fine one or more product versions (e.g. silver, gold, platinum, etc.): each plan have its billing configuration.
You can find more information about pricing models and how to create a new plan.
Metrics
Metrics represent facts of a specific application that are relevant for software vendors. To better understand metrics and how to add custom metrics to your application, please read this section.
Technical Onboarding
This section is focused on technical side of the onboarding. We made the technical onboarding as smooth as possible, anyway we strongly recommend you to read this section before onboarding your product and during the onboarding process.
Onboarding of products
The technical part of the onboarding process depends on the application provisioning type:
- for Syndicated Applications, the software vendor has to provide a "syndication endpoint" and proceed with the integrations via API, as described in this section
- for Service, the same rules of syndicated applications applies, but the integration is optional
- for API products, please refer to the API section.
The following sections refer to other additional functionalities that can be used for Syndicated products.
Application Metrics
Understanding Application Metrics
Application Metric (AKA Custom Metrics) represents facts of a specific application offered in the Cloudesire Marketplace that are relevant for the software vendors.
For example, a software vendor could be interested to know how many documents a certain application instance produced in the last month, or how many active users an application has at a given time.
This kind of information are useful for monitoring purposes (i.e. to see a dynamic real-time graph in the Cloudesire Dashboard), but also allows software vendors to implement pay-per-use pricing models. Furthermore, specifying a unit-price for a custom metric (e.g. 10 USD per active user) allows Cloudesire to calculate the related incomes in a certain period of time (billing period) and issue an invoice to the customer. Details are provided in the Billing Module Section.
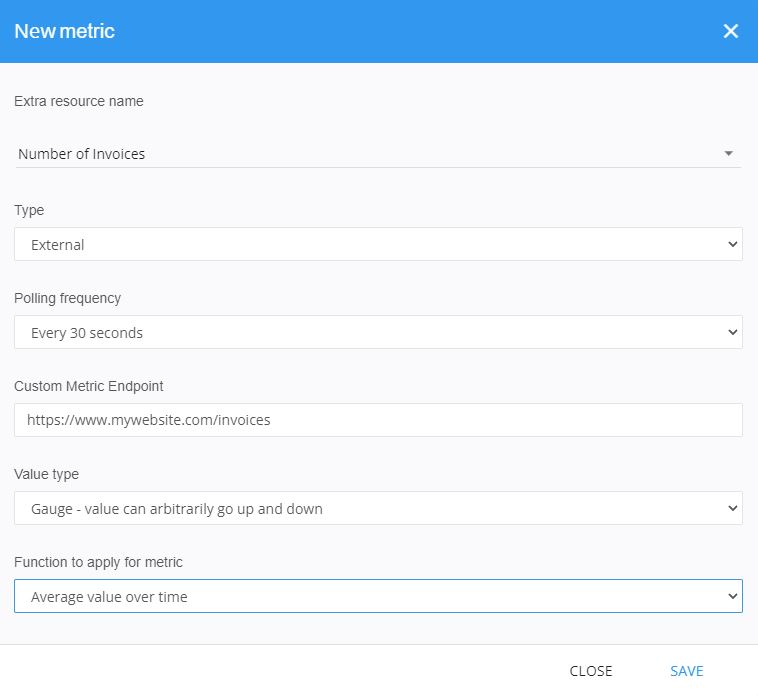
Each metric could be detailed in the editing section, with these fields:
- Extra resource name: the name of the
extra resource that will be linked, which
needs to be:
- previously created
- configured with Payment Option set as "pay as you go"
- configured with its specific pricing schema
- Type: can be:
- External: when the actual values must be provided by a 3rd-party system, such as the vendor's platform
- Native: when the actual values are automatically retrieved by Cloudesire itself; this is valid only for special cases, BareVM products and native integrations
- Polling frequency: the platform will poll your endpoint with this frequency;
- Custom Metric Endpoint: must be defined in the form of a relative URL (e.g.:
/metric/users) - Polling frequency: the platform will poll your endpoint with this frequency
- Value type: can be:
- Gauge: value can arbitrarily go up and down
- Counter: value always increments
- Function to apply: can be:
- Average value over time
- Peak value over time
Additional custom Functions can be specified by the platform administrators.
How to add Custom Metrics
Follow the step below to a add one (or more) Custom Metric to a Product. Firstly, you need to access to the product editing page, "Metrics" tab.
To find the "Metric" tab go to your personal Control Panel. You will be able to access the "Catalog" from the left menu. Then select the product you want to add custom metrics to, click on it, select "Edit" and go to the "Metrics" section.

By clicking on "Add New Metric", you see a pop-up where you can set up a new metric.
How to provide a value for a Custom Metric
In case of Syndicated applications, it's required to expose an URL returning a JSON response, by taking care of retrieving the subscription ID from the HTTP header of the Cloudesire's request. In this way, the URL will return the right actual value of the metric for each specific tenant. More details are available here.
Configuration Parameters
Applications may require a list of parameters that needs to be provided by customers before using the application for the first time, either for the application to work properly or to provide better initial customization.
Configuration parameters filled by the customers are exposed via API (continue reading this section).
Each parameter is created and bound to a specific Product, but must be activated on one or more Plans. Each parameter can required or not, and its value can be validated by providing a regular expression. In order to support customers to fully understand, each parameter has a description and a hint field.
To manage Configuration Parameters, enter the Product editing page, then select the "Configuration Parameters" tab.
For each parameter you need to specify:
- Code: a unique identifier of the parameter. It is not shown to the customer
- Name: a name for the parameter. It will be shown to the customer so it has to be clear
- Description: a short explanation provided to the end-users
- Validation (optional): a regular expression to validate the text provided by end-users
- Accepted values (optional): a list of possible values for the parameter
- External values URL (optional): the URL of an external endpoint used to obtain the possible values for the parameter (more information)
- Hint: text inside the placeholder that helps end-users to complete the field
- Required (yes/no): sets if the customer needs to specify a value for the parameter before purchasing the product
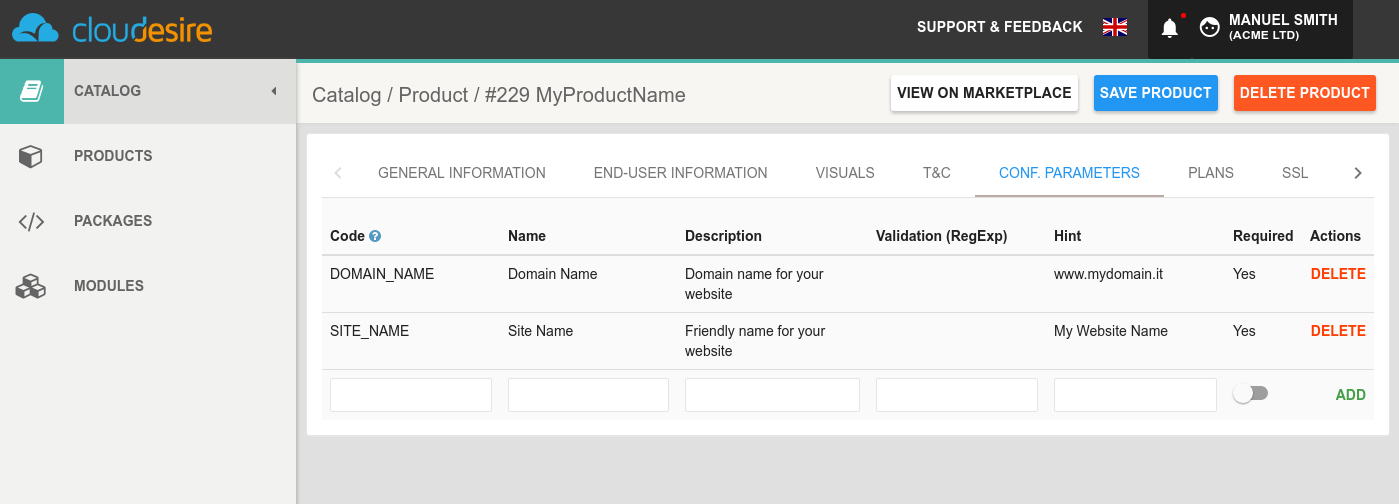
Once Configuration Parameters are set for a product, they need to be attached to one (or more) "_Plans". To do that, click on the "Plans" tab, select a specific Plan and click on the "Advanced" section button.
The Cloudesire API gives the vendor the possibility to retrieve both a specific Configuration Parameter definition and the related parameters "value" (namely the valued specified by the customer during the order placement).
Configuration Parameters values can be retrieved via API fetching the Subscription object:
GET /api/subscription/2388 HTTP/1.1

{
    "id": 123,
    "configurationParameters": {
    "configurationParameter/2095": "param1 value",
    "configurationParameter/2096": "param2 value"
    }
}
To fetch the definition of a specific parameters you can invoke:
GET /api/configurationParameter/2095 HTTP/1.1

{
    "code": "PAR01",
    "description": "Your blog domain",
    "hint": "Specify the domain from which your blog will be reachable",
    "id": 2095,
    "name": "domain",
    "required": true,
    "self": "configurationParameter/2095",
    "validation": "^(?:[-A-Za-z0-9]+.)+[A-Za-z]{2,6}$"
}
Order validation
It's possible to configure one or more external endpoints to process further validation while ordering an onboarded product or terminating a subscription.
Follow the instructions on order validation to do so.
Demo marketplace for tests
In this section you will find an overview of the integration facilities provided by Cloudesire to help developers during the onboarding process.
Using the Staging Marketplace
While developing the integration with the Cloudesire platform, it's useful to run some tests on our Staging Marketplace, where payments can be done with dummy credit card numbers, and where you can test the whole customer journey, end-to-end.
We strongly recommend to test applications on the staging marketplace to discover integration issues before the application is published on the production marketplace.
Staging Marketplace URL and API endpoint
A Staging Marketplace is freely available upon request.
The API endpoint can be found in the API documentation section.
In Staging marketplace, you can freely create as many accounts as you wish, both vendor and customers type, and you can use the dummy credit cards numbers to simulate payments.
Manage API endpoints as Configuration Parameters in your source code since they need to be changed when publishing your application in a different marketplace.
How to test the customer experience on the Staging Marketplace
To fully test your integration source code, once you have finished the application onboarding process we strongly suggest you to:
- request a new customer account on the staging marketplace
- login to the marketplace with the customer credentials (created previously)
- browse your applications or look for your application using your application name
- buy your application
- use a dummy credit card
- wait until the provisioning process is complete
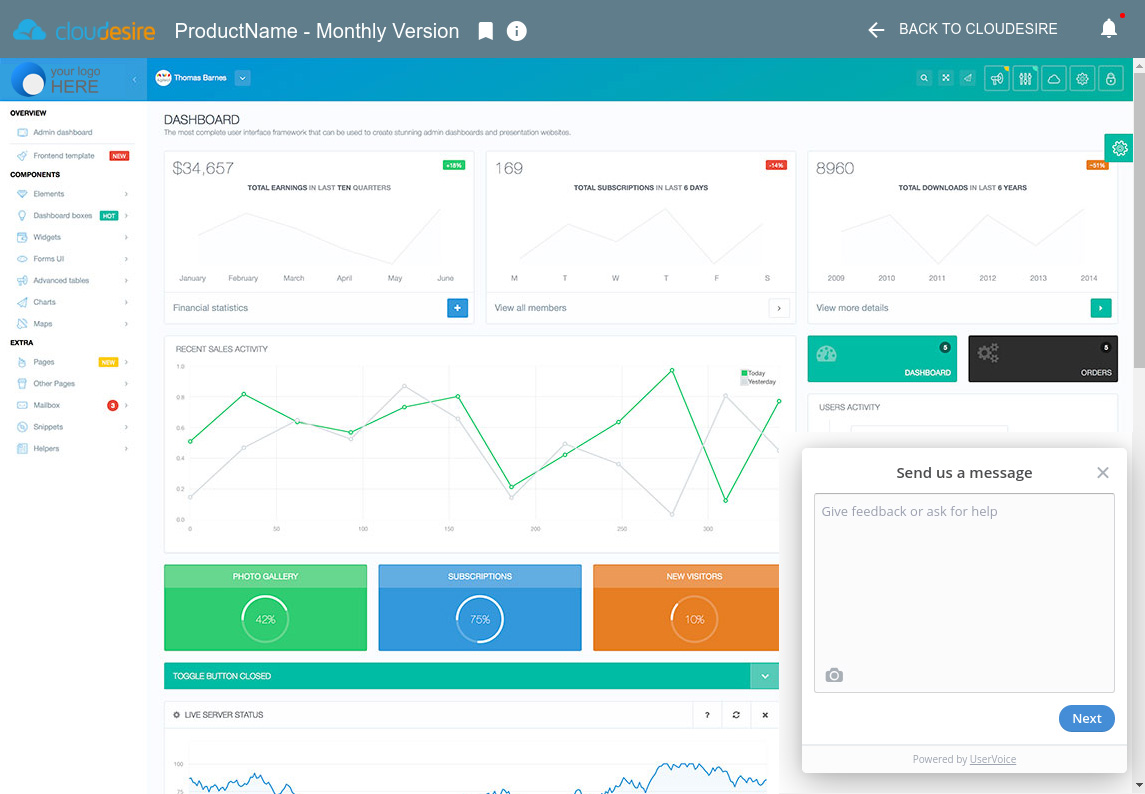
Once the application is ready (the entire process shouldn't require more than a few minutes) you will see in your dashboard an interface similar to this (which refers to a running _trial):
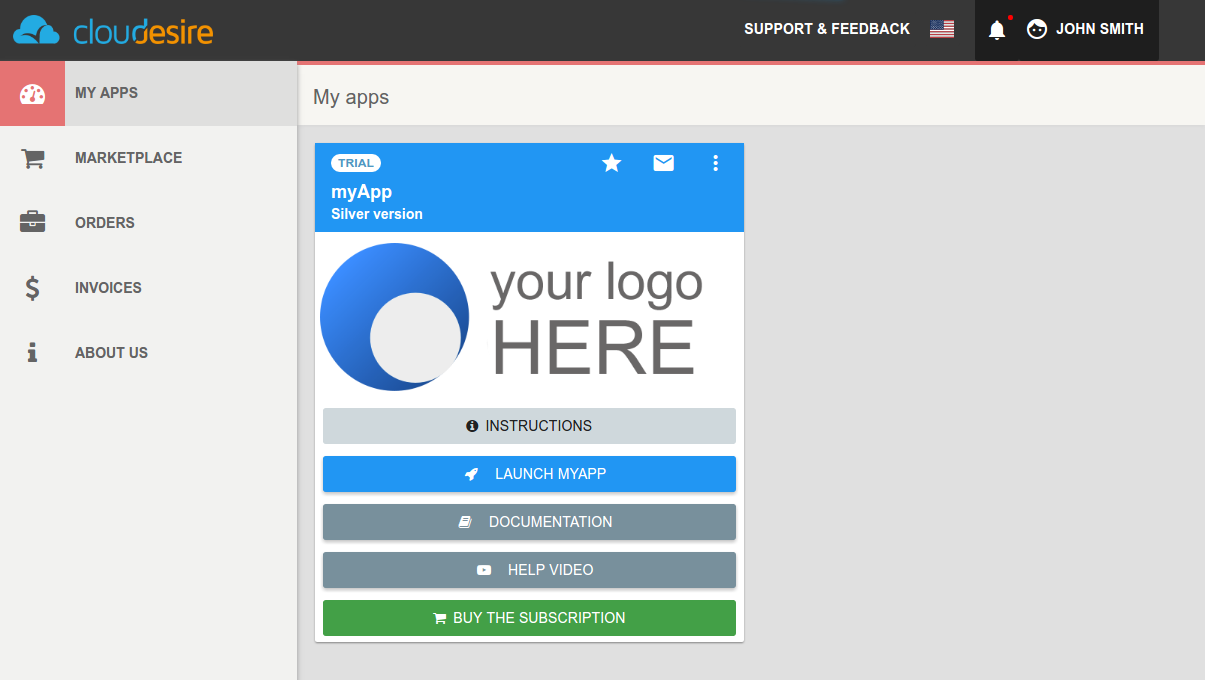
By clicking on the "Launch application-name" button, the customer will be redirected to a view where:
- the application runs in the body of the page
- the header of the page contains the running application name and version and provides some tools (bookmark, end-user instructions, customer profile details, etc.). This header will be also used to provide useful notifications (subscription about to expire, private messages, etc.). Also, from this section customers will be able to going back to Cloudesire
- a customer support tool is available (to give the customer the possibility to send direct messages both to the platform administrators and vendors) Those messages will be managed by an integrated trouble-ticketing system
